Sunday, December 18, 2011

Seed Stitch Ear flap Hat

This hat is essentially the same as the previous hat, but without the ears and the addition of seed stitch flaps and edge to prevent curling. This pattern was pulled from the hey julie blog but she only gives the details in the comments section so it was a little harder to find. This makes a small size hat perfect for a newborn / baby size. You could adjust as needed to make a bigger size, see Julie's blog for more info.

YARN: Lion Brand Superwash Merino Cashmere in Seafoam (super soft!)
72% Superwash Merino Wool, 15% Nylon, 13% Cashmere
AMOUNT: Less than 1 ball (87 yards / 80 meters)
NEEDLES: US 8

EARFLAPS (MAKE 2)
CO 5 stitches
R1: *P1, K1* to last stitch, P1
R2: KFB, K1, P1, K1, P1, K1, KFB (7 sts)
R3: *K1, P1* to last stitch, K1
R4: KFB, *P1, K1* P1, KFB (9 sts)
R5: *P1, K1* P1
R6: KFB *K1, P1* K1, KFB (11 sts)
R7: *K1, P1* K1
Continue in seed stitch until piece measures 2.75" then cut leaving a 12" tail. Leave on needle.
Repeat.

HAT
Using cable cast-on, CO 9 sts on circular needle. Knit the 11 sts from the first ear flap, then CO 21 sts. K 11 from second ear flap, then CO 9 sts. (61 sts)

Join, being careful not to twist stitches, place marker and begin knitting seed stitch in the round. K1, P1 around for 5 rows, then switch to knit all. Continue knitting until hat is almost 3" and Knit the two stitches together right before the marker. 60 sts. Knit all around until the hat measures 3" from the cast-on edge. Then begin the decreases, switching needles when it becomes to tight to knit around:

Decrease R1: *K8, K2tog*
Decrease R2: Knit all
Decrease R3: *K7, K2tog*
Decrease R4: Knit all
Decrease R5: *K6, K2tog*
Decrease R6: Knit all
Decrease R7: *K5, K2tog*
Decrease R8: *K4, K2tog*
Decrease R8: *K3, K2tog*
Decrease R10: *K2, K2tog*
Decrease R11: *K1, K2tog*

Pull yarn through remaining stitches with a tapestry needle, pull through to the inside and weave in ends. There were two gaps near the ear flap that I tightened up using the ends was weaving in from the ear flaps.

Tuesday, December 6, 2011

Baby Ear flap Hat with Ears

front of hat

I really wanted to make a little baby hat with earflaps AND bear ears on top and it seemed impossible to find a pattern. I ended up combining a few different patterns together to get the result I wanted. It's a fun project and while it does take longer than a simple knit hat, it's still relatively quick. You still have time before Christmas!

YARN: Fiesta Cottonista in Painted Desert
50% Peruvian Pima Cotton, 50% Tencel
AMOUNT: Approx 1 ball (110 yards)
NEEDLES: US 5

I started by following the baby/kids earflap hat pattern from the hey julie blog in the middle 16" size (14", 16" and 18"):

Ear Flaps
CO 7 stitches.
Row 1: K1, P to last stitch, K1.
Row 2: K1, Kfb, K to last 2 stitches, Kfb, K1.
Repeat these two rows until there are 15 stitches on the needles.

Knit straight until piece measures 2.75" (3", 3.25").
Cut yarn, leaving a 12″ tail, and leave the earflap on its DPN.
Repeat for second ear flap.

Hat
Using a cable cast on, CO 10 (12, 14) stitches on the circular needle. Knit the 15 stitches from first ear flap, then CO 24 (27, 30) stitches. K15 from second ear flap, then CO 10 (12, 14).

Join, being careful not to twist stitches, place marker and begin knitting in the round. As you knit around this first row, you’ll notice four gaps, on either side of each ear flap. When you get to those, K2tog to close them up. At the end of the round, you should have 70 (77, 84) stitches on the needles.

Continue knitting all rounds until hat measures 3"″(3.5", 4"″) from the cast-on row. Then begin the decreases as follows, switching to DPNs or two circs when the diameter of the hat is too small for your circular needle:

(Decrease) Row 1: *K8 (9, 10), K2tog*
Row 2: K all sts
(Decrease) row 3: *K7 (8, 9), K2tog*
Row 4: K all sts
(Decrease) row 5: *K6 (7, 8), K2tog*
Row 6: K all sts

Decrease in this manner until there are 35 sts on the needles.
Then decrease in the same manner, omitting the “k all sts” rows, until there are 7 sts remaining.
Pull yarn through the last 7 sts with a tapestry needle, pull through to inside and weave in end.

Finishing
Weave in all ends. (I like to leave the tails where I ended the earflaps long so that I can use them to tighten up of otherwise correct anything that looks wonky around the earflap join area.)

back of hat

At this point I was a bit disappointed with how badly the edges were curling and knew even when I blocked, it's probably always going to curl a bit. To fix this, I decided to pick up and knit along the entire edge of the hat and earflaps.

Work your way around the hat edge, starting in the back, and make sure you have an even number of stitches. Once you're back where you started, begin a K1, P1 rib stitch. Go around the hat in this pattern twice and then bind off all stitches, keeping in the rib pattern. TIP: When binding off around the earflap curved edge, do so VERY loosely. If you bind off too tight here, the earflaps will pull weird towards the bottom.

Next I wanted to add the cute little bear ears on top. TIP: Leave a long tail here on BOTH ends of the ear piece to sew with! The ear pattern came from a hat on the Berroco website:

Ears (Make 2): With US 5 needles, cast on 11 sts. Work even in St st for 6 rows, end on WS.
Shape Top: Dec Row (RS): K1, k2 tog, k to last 3 sts, SSK, k1 – 9 sts. Rep this dec every RS row twice more, end on WS – 5 sts.
Inc Row (RS): K2, M1k, k1, M1k, k2 – 7 sts. In this manner, inc 1 st each side every RS row twice more, end on WS – 11 sts. Work 6 rows in St st. Bind off all sts. Fold ears in half and sew side seams. Sew one ear to each side of hat.

ear seam

So HOW do you sew the ears on? No idea. I found that the best option was to pin the ears in place so they were pretty well spaced and lined up, about 2" apart (1" over from the center of the top of the hat). Next I used one of the tail pieces of yarn and started the mattress stitch (shown here) to create an invisible seam. It worked! There are probably other ways to do this, but if you want it to look like part of the hat, this seems like the way to go.

Lastly, you could add the little braided cord down from the earflap, but I thought there might be too much going on with that. If you leave off the bear ears, I would definitely add the cord.


Monday, November 7, 2011

Baby B's Flame Chevron Blanket

I've finally finished this Flame Chavron blanket I started in June for little Baby B. The lace pattern creates a really cool flow and is easy to learn once you get going. I think it's just the needle size that makes it take awhile.


FINAL SIZE:
34" long x 24" wide
YARN: Linea Pura, Lana Grossa, Organic Soy, Cotton and Bamboo
AMOUNT: Approx 4 balls (they are 50g, 110m each)
NEEDLES: US 8


CO 95 sts (pattern is worked over a multiple of 7 sts + 4, + 14 sts for border)

Start by knitting 10 rows of Seed Stitch (K1, P1)

(K1, P1) for 7 sts, place marker. Follow chart below for Row 1. Place marker, (K1, P1) for 7 sts.

Only RS rows are shown on the chart. When working WS rows, P all sts.

Continue to follow the chart starting and ending each row with 7 sts of Seed Stitch for border.

I followed this complete chart a total of 7 times. Once you finish the last row, Seed Stitch (K1, P1) for 10 rows, BO and weave in ends.

Make sure to block the finished blanket to open up the lace pattern.

TIP: Only the red section repeats which I couldn't see very well in my printout on my first row. Make sure you highlight that somehow if you print out the chart to carry with you. The chart can be found here.


Thanks to Barbara G. Walker's A Second Treasury of Knitting Patterns and at Knitty

Tuesday, October 18, 2011

Linda's Baby Kit

This cute little baby kit was made by my mother-in-law, Linda for an upcoming raffle. She did an amazing job, especially after not having knit for many, many years.

For the blanket she followed the diagonal garter stitch blanket pattern on this blog by pulling from two balls of yarn on size 11 needles.

She embellished the other pieces with some crochet and found the two patterns on Knitting Pattern Central.

Click here for the hat.
And here for the cute little booties.

I think I'm going to have to try and make these as well!

Tuesday, July 26, 2011

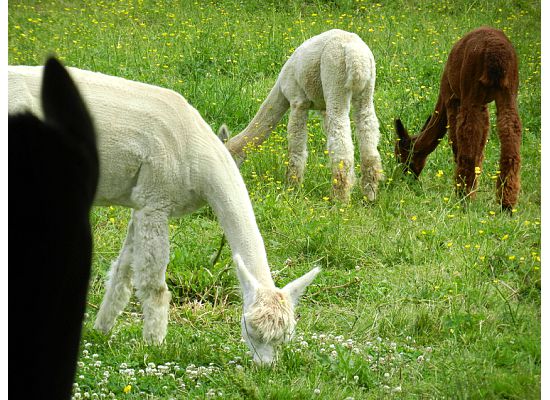
Snowball the Alpaca

Meet Snowball. The cutest Alpaca in Maine, at least she looks like she would be. I haven't gotten to see her in person, but when my parents took a trip up to Maine from Boston last month they happened to pass by Winters Gone alpaca farm and store. Knowing of my yarn and knitting addiction, they decided to stop in and pick up a couple of skeins for me (nice!).

This farm is neat in the way that each yarn is labeled so you know exactly which alpaca your yarn came from and it is all the original animal's coloring. The yarn is so incredibly soft, I can't wait to knit something with it! Thanks mom!


Winters Gone | Bath, Maine | 800.445.2404


Tuesday, June 7, 2011

Ribbed Baby Hat


To match the ribbed baby jacket I made, I thought this ribbed hat would go perfectly.

CO 48 sts on 16" size 8 circular needles
Join in the round, careful not to twist sts
*K2, P2* around and around until the work measures 4.75"-5"
If you want to fold the hat up at the bottom and have a little cuff, make it even longer.
*K2, P2TOG*
*K2, P1*
*K2TOG, P1*
*K1, P1*
*K2TOG*
Pull yarn through remaining 12sts and pull tight.
Weave in loose ends.

Tuesday, May 31, 2011

Baby Julia Sweetie Pie


For baby Julia I decided to make the Sweetie Pie Kit (minus leggings) from the Pickles website. I used Rowan pure cotton in three colors. The thing is, something is very amiss with this pattern that I never could really figure out.

The little dress and hat is so very cute, but be warned if you attempt this pattern! I tore it out 3-4 times before I remembered I could use a "life-line" to hold my spot just before I got to the problem area of casting-off for the sleeve holes.

In order to use a life-line, simply take a sewing needle and some contrasting yarn (preferably thin) and carefully thread it through every stitch you are working. Continue knitting as normal and hopefully you don't need to use it. If you do, just take the work off the knitting needles and pull out all of the stitches until you get to the contrast yarn. It will not allow you to pull out those stitches, so you just pick up all the stitches with your knitting needles again. As you continue to work on a project, you may want to add a new life-line every few inches so you don't have to pull out so much of the piece if you mess up later.


Here is the link if you want to give it a go:
http://www.pickles.no/sweetie-pie-kit/

Good luck!